Showing posts with label Zaino. Show all posts

Saturday, July 8, 2017

Sunny Day Means a Wash and Detail!

Right before Japan's raining season (late June and July), I happened to be home on a weekend where I had some free time. And it was nice and sunny.

I had recently noticed some minute scratching in the paint surface, so in addition to giving the car a wash, I decided some work with an orbital buffer would also be good.

Using, of course, my favorite car care products from Zaino.

I know, it's not good to dry in the sun. I had to move fast...

Loe how the water still beads even though I don't wax the car regularly. This is the Zaino AIO in action (plus the occasional Z-9 or Z-7 instant detailer spray)

Blinded by the light!!

Another shot - I wonder if I should get an OEM carbon fiber trunk lip spoiler? 

Here in Japan, with our narrow streets, I had to park and not block the main street!
All done! Hard to tell the gloss though...

Here we go. 
So what do you think? Shiny enough? I think the Lexus has very high quality paint, which makes cleaning up and looking good so much easier...

Friday, September 23, 2016

"New" Wheels (Part 3)

So I was really eager to pick the car up! And not just because of the "new" wheels...
So in addition to getting "clean new" wheels put onto the car, I decided to use this opportunity to resolve another issue, one that had been bothering me ever since I bought the car.


WHAT IS THIS BLANK SWITCH??

Why did Lexus do this? I mean, since this car was equipped with all of the options, should they not design cars to use up all available switch space?

So I found on eBay this "Rupse TPMS for Toyota."  I was naive in that I thought that all Toyota switches were standardized, but more on that later.


First, I had Ninomiya-san contact a tire fitter who took the tires off the wheels, and install the sensors.  He then hooked up the display unit in the car.

I'm happy to report that, for about $100, the electronics appear to work perfectly. Not only do I get fairly accurate tire pressure readings (off by 0.1 bar according to Ninomiya-san), but also the temperature in Celsius! Very cool.


The problem, as I alluded to above, and you can see in this photo, was that the display size is 34mm x 23.5mm. The blank switch, however, if 40mm x 22mm. So while it holds itself in place, there is a noticeable gap on top and bottom.

After some research it appears that these dimensions are the size for Honda switches. Figured it was too good to be true. But not all is lost. I've already figured out a way to, at very least, make this look better... I think.

In any case, and more importantly, the car looks fantastic now with the "new" wheels.
Amazing how NO curb rash improves the looks!
Even two Italians (Dino and Ennio) thought so:
Ennio was in town, helping Dino get his BNR34 ready for the annual GT-R Magazine meeting
In any case, I also had Ninomiya-san install ONE MORE ITEM. And this one is AMAZING. Check back for my report on that!

Wednesday, September 7, 2016

Full Detail!

Back in May, I took the Lexus into RAPT, the closest detailing shop to me. Kabe-san, the owner, has taken good care of me over the years with my GT-R.

My main goal was to have the car professionally polished with all minute scratches removed, and the protection (the "glass coating") was secondary, because I was planning on using Zaino like I always do to get the maximum shine and protection.  It turns out this was the right thing to do, as the particular glass coating he used, the least expensive Echelon glass coating product (compared to the top of the line Echelon Nano-Fil product he used for the GT-R), was not very good at having the water "bead and run off" like it did with the GT-R. Hydrophilic, not hydrophobic I guess. He also did the interior as well.

Anyway, some photos from when I picked up the car.


I also asked him to repair some leather that was fading, right along this seam.
This is the tool he used to remove dust and dirt from the holes in the seat
Nice and shiny!
He polished the headlights as well!
I told him not to bother with the wheels because they are scratched up, but he polished them anyway

As before he was kind enough to post some pictures up on his blog.

Here they are...amazing the difference in camera quality lol...


Showing how he removed the seats to vacuum underneath.
Now, photos do not do the car's paint justice. Hopefully I'll be able to put up some photos in daylight soon. Before that, however, I have some actual mods too....

Tuesday, January 19, 2016

Some New Year Cleaning... Part 3

After the New Year celebrations I found myself on the holiday, Monday January 4th without anything to do.  The weather was nice, and even though I was relatively satisfied with how clean I had gotten the car, I decided to fool around a bit... famous last thoughts because I ended up working on the car until it got dark!

Anyway, first order of business was, I was wondering about what lay under all that plastic under the hood.  Turns out Lexus uses some very clever plastic clips which, if pushed down past the initial indent, allow for easy removal.  Once I began taking all the clips off, and began peeling off the plastic covers, I discovered this:
See all that dirt that had been trapped underneath the cover...
And you can see all that dust and dirt on the front strut area too! Amazing...
Dust and dirt on the plastic boxes and the front strut area on this side too
You can see the dirt on the bottom side of the cover as well
So of course, these pieces had to be washed with some Simple Green and cleaned up
You can see all the visible dirt all over... what to do?
Liberal application of Simple Green, being careful not to spray into what appear to be electrical items, and using a soft brush to make sure that all surfaces are cleaned. 
We ended up with all the rubber and plastic items cleaned up:
(Most) Everything is clean. 
Tower bar area...nice and clean (and yes, I applied Zaino AIO there too)
It goes without saying that I applied Zaino AIO to all painted surfaces under the hood. Then, it was just a matter of applying some engine protectant/detailer.

This stuff is good, but must be applied sparingly...
With the center cover back on... I actually like the way this looks, except for the half painted front frame.
Would look so good if it was all steel under the hood was painted to the same level as the rest of the body.
Yellow arrows point to the painted areas that got cleaned up and to which I applied ZAINO.
Meanwhile, while I was waiting for the plastic cover pieces, as well as the detailing spray to dry, I realized one minor detail I had yet to tackle:

Those exhaust outlets need some TLC!
So simply washing the car didn't remove this burnt on stuff...
The chrome polish easily took the crud off the top one...
So while the chrome polish made short work of the top exhaust outlet, the crud on the bottom one did not come off no matter how much I tried. So...

Time to use some mechanical help...
Now nice and shiny!!
I repeated on the other side, and then used some Black on Black spray instant black spray to bring the black back to the inside of the exhaust tips (after cleaning them out of course)

Look like real exhaust pipes? LOL. Who knows how long they will stay that way...
Put everything back together, and applied some more Aerospace Protectant
Done! Clean enough to eat off of!
Truth be told, there was one additional NON-cleaning item I took care of that day, which I will cover in my next post. Stay tuned!

Wednesday, January 13, 2016

Some New Year Cleaning... Part 2

A few days after doing the initial Zaino AIO application right as the year end holidays began, I found myself with a free afternoon on the 31st. So of course...

First, I decided that even though the exterior was still fairly clean (from the wash 3 days prior), I had to redo the wash and Zaino application, this time taking more time to manually apply the Zaino in places I had missed like the inside door jambs.  However, before I washed the car, I decided to do the interior first.

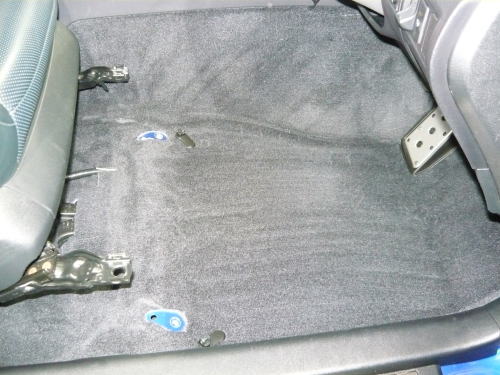
A quick vacuum to get rid of the dust UNDER the carpets, in the center console, etc.

The vacuum first was necessary because I planned to use this, which promised a "New Car Scent"
I had picked this item up on a recent trip to the US. Would it work or would make things worse?
Here it is in action:
Amazingly, this one didn't seem as toxic to higher life forms as the one I used previously
While the interior was being re-freshed, I quickly washed the car, starting with the wheels:

Something else I had picked up a while ago but never had a chance to use
 Combined with a spray cleaner that converts brake dust to a disgusting purple liquid:


Although I plan to get rid of these curb-rashed wheels, might as try to get as clean as possible. But I'm not spending 200% effort like I would with the wheels on the GT-R.

Pretty nasty stuff - the Brembo calipers don't leave much space actually.
Once the wheels were done, I wetted down the car, and yes even though a nice foam sprayer would be nice, simply used a mitt and the Zaino Z-7 car wash.

And of course the two bucket method....
I found that the use of the brush allowed me to get more areas...
will need to apply some tape to the metal part to prevent scratches in the future.
From there, I simply dried the car and then first hand applied the Zaino AIO to areas where the Porter Cable could not reach properly - this includes the rear spoiler as well as around the windows and badges, the mirrors, door jambs, etc.  Then I applied the Zaino to all large areas using the PC.

Actually this was DURING the hand application of Zaino, right after I had dried the car
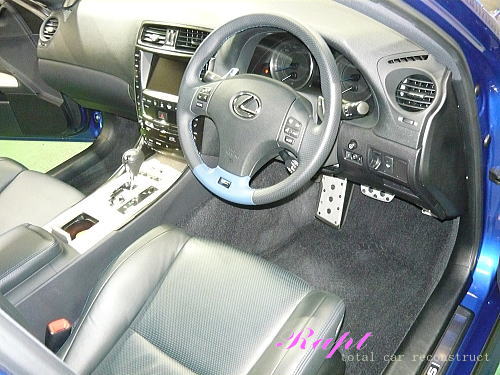
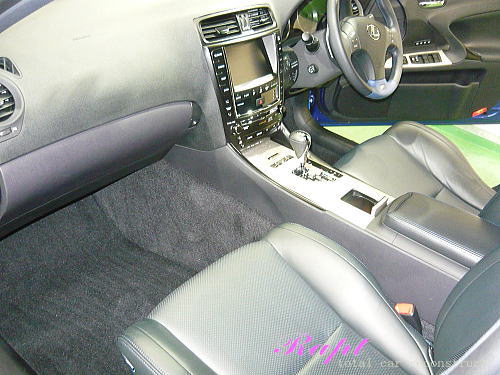
As I let the Zaino dry, I then went back and applied the Zaino leather treatment to the entire interior (last time it was only the driver's seat), as well as Aerospace Protectant on vinyl and other plastic areas.
The Zaino leather cleaner in action

Not sure if you can tell, but here are photos of before, during and then after:
Before application to the side bolster
Application and scrubbing it in...
And afterwards. See any difference? No? Me neither... although it did feel a bit softer than before
This is good stuff. I used it on all rubber seals on the doors and trunk as well.
The last thing I did on this day was to polish the headlights. It's not that they were noticeably yellow but since I had all my stuff out, and fading light, decided to finish for the day with something that I would be able to relatively quickly.

This stuff really works!
In the past, I have used the Poorboys SSR2.5 to revitalize some cars that had some paint fade, and used it in once on my GT-R, but since then hadn't had a chance to use it. What's nice is that this starts out as a medium grade abrasive but then as you buff, the abrasiveness goes down. So, you end up with very little scratching.

Anyway, by this time I thought I was done... but it turns out I wasn't! See my next post for what I had forgotten to do...