Showing posts with label protection. Show all posts

Saturday, September 8, 2018

LEMS Carbon Fiber Lip Spoiler Install

So this is indicative of how long it's been since I last updated this blog (for real, not the sticker stuff in my last post) - this mod was done last July 9 (2017!!)! So over a year ago! Sorry friends, but obviously I don't do much for this car compared to the GT-R so updates don't seem as urgent...now that the car is off warranty (as a CPO car, it had a comprehensive warranty that expired in August 2018), I'm itching to do some stuff to bring out the car's best.

Anyway, soon after I bought the car, I was researching the various types of cosmetic mods - such as carbon fiber front lips (and other body part) options, and stumbled upon LEMS. There are other companies here in Japan that do Lexus stuff too such as NOVEL and ThinkDesign but each seems to have their own speciality. For example, ThinkDesign has some very tasty interior parts, and NOVEL has the market cornered with race developed engine and suspension mods.

The car without the carbon lip spoiler
So one day I was casually looking at items on Yahoo Auction, and found the item below, being sold by LEMS themselves (I could tell as the Seller ID was different but the address was LEMS).  The lip spoiler was being offered for substantially less than retail price of over 220,000 yen, so I figured maybe it was a one off or maybe slightly damaged.


When I got the box, it didn't inspire much confidence on the contents.

But yes a genuine LEMS product, with these instructions...


Wow. Gorgeous weave. Too bad this is on the UNDERSIDE and can't be seen

I had my friend Alessandro come over to help. 

The white stuff is clear silicon, not glue!

The lip spoiler is very well made. In fact, I could have simply slipped it on and it would have stayed on. But I went ahead and used some silicon as you can see in the above photo. First, I didn't want any water accumulating. Second, and more importantly, I was concerned about scratches to the bumper paint.  So we just slipped on the lip spoiler and I think there were a couple of screws on the outer sides, and voila!


One of the easiest mods I've ever done. Didn't even need to lift the car up (had jack stands ready just in case)

Really makes the car look better!
Verdict - great mod! Makes the front end of the car look much sharper and lower to the ground. I've only scraped a couple of times in tower parking lots as I'm going up or down a steep ramp, but the scratches aren't noticeable.

I'd say the problem now is, I am very tempted to add more carbon to the front of the car... it can certainly use more of it!!

Saturday, July 8, 2017

Sunny Day Means a Wash and Detail!

Right before Japan's raining season (late June and July), I happened to be home on a weekend where I had some free time. And it was nice and sunny.

I had recently noticed some minute scratching in the paint surface, so in addition to giving the car a wash, I decided some work with an orbital buffer would also be good.

Using, of course, my favorite car care products from Zaino.

I know, it's not good to dry in the sun. I had to move fast...

Loe how the water still beads even though I don't wax the car regularly. This is the Zaino AIO in action (plus the occasional Z-9 or Z-7 instant detailer spray)

Blinded by the light!!

Another shot - I wonder if I should get an OEM carbon fiber trunk lip spoiler? 

Here in Japan, with our narrow streets, I had to park and not block the main street!
All done! Hard to tell the gloss though...

Here we go. 
So what do you think? Shiny enough? I think the Lexus has very high quality paint, which makes cleaning up and looking good so much easier...

Tuesday, September 20, 2016

"New" Wheels (Part 2)

So as you saw from my last post, I found some used wheels in good condition, with near new tires. My task has been to clean up the inside of all the brake dust, as well as to remove the scratches in the chromed parts, to the best of my ability. Granted, I bought those wheels last DECEMBER(!) so this project has been taking me a while.

With my current wheels, they collect so much brake dust and the dust is really hard to remove. No matter how many times I wash and use chemicals, or even special brushes, the dust just accumulates. There appears to be a "crust" of brake dust that just does not want to come off, and makes it easier for more brake dust to accumulate.

The purple stuff is brake dust MELTING away...
Specialist tools to get all the brake dust. I've never had to use this on the GTR. 
Yuck!
Anyway, there is a reason why I don't have this problem with the GT-R. You see, whenever I get wheels for the GT-R - whether the original OEMs that came with the car, or the RE30s I had for a few months, the TE37s or the LMGT4s I used only on the track, I always, when new/clean, apply this:

I love this stuff. You can buy it here.
Before I applied this, however, I wanted to make sure the wheels were absolutely the cleanest they could be.

A bit of brake dust here, so

I used some detailing clay to remove what I could
I was surprised to find this much still embedded!
So while the clay was certainly helping, after doing all 4 wheels, I still felt like I hadn't gotten rid of all I could. So, I ordered this stuff from the same place that makes the wheel "glass coating":

Which is basically a super strong acidic solution, much stronger than the off the shelf purple stuff I normally use
I now felt my wheels were clean enough, so I applied several thin coats of the glass coating:

With iPhone in one hand, pretending to apply with the other...
Why all of this prep? See my next post as to what I am doing with these wheels!

Wednesday, September 7, 2016

Full Detail!

Back in May, I took the Lexus into RAPT, the closest detailing shop to me. Kabe-san, the owner, has taken good care of me over the years with my GT-R.

My main goal was to have the car professionally polished with all minute scratches removed, and the protection (the "glass coating") was secondary, because I was planning on using Zaino like I always do to get the maximum shine and protection.  It turns out this was the right thing to do, as the particular glass coating he used, the least expensive Echelon glass coating product (compared to the top of the line Echelon Nano-Fil product he used for the GT-R), was not very good at having the water "bead and run off" like it did with the GT-R. Hydrophilic, not hydrophobic I guess. He also did the interior as well.

Anyway, some photos from when I picked up the car.


I also asked him to repair some leather that was fading, right along this seam.
This is the tool he used to remove dust and dirt from the holes in the seat
Nice and shiny!
He polished the headlights as well!
I told him not to bother with the wheels because they are scratched up, but he polished them anyway

As before he was kind enough to post some pictures up on his blog.

Here they are...amazing the difference in camera quality lol...


Showing how he removed the seats to vacuum underneath.
Now, photos do not do the car's paint justice. Hopefully I'll be able to put up some photos in daylight soon. Before that, however, I have some actual mods too....

Tuesday, April 5, 2016

New Bumper Cover... Part 2

Two days after I dropped off the car at the local Porsche shop CREF, I went to pick up the car.
That is one tasty 911 GT RS3....
As if not obvious by now, I had gone to this shop because they seem to be one of only a very few places in Japan that specialize in the application of protectant film for cars (they had a Bentley in the shop when I had arrived, and a Gallardo on the way...). Rather than anything from 3M, they use the Xpel line up, and in particular they used the latest self-healing type (Xpel Ultimate) for my car. Here is a video clip I found:


And here is a link to the nationwide association in Japan these guys at CREF actually head up.  I had gone ahead and ordered the full front bumper (of course), the door handle cups, the top of the rear bumper, and lastly, some custom work on the rear door entry areas (because of the kids). What's interesting is that, while the bumper of course is brand new, the other areas had some slight scuffs in the clearcoat - and yet as Ishiguro-san at CREF promised, once the film was applied those slight imperfections really can't be seen!
Yes, slight orange peel visible, but now I can fly on the expressway with no worries...
(the hood already has too many chips for me to care)
In any case, this being Japan the craftsmanship was, as usual, nearly perfect.
Door handle cups - all 4 done!
Upper bumper area which often gets scratched when loading stuff. You can see my finger pointing to the line
On the rear door entry areas, we originally were planning just a simple strip on the edge, but they went ahead and put down a whole lot more, just in case (and without changing the estimate!)

Arrow pointing to upper edge

Arrows show bottom edge and how it extends to the side.
Obviously several other areas of the car still need work - for example the hood needs to be repainted in places and the right rear quarter panel has some paint chips. But for now I'm happy with the additional protection.

I'm not done with CREF though... turns out they have 2 other key items I've been looking at getting done...

Friday, April 1, 2016

New Bumper Cover... Part 1

So, as the title says, one thing I had done at the Lexus dealer was to have the beat up original bumper cover, with all of its scratches and chips thanks to the previous owner, replaced with a brand new bumper cover from the factory. Being a Lexus factory part, the paint is absolutely perfect.

Beautiful!
But to stay absolutely perfect is not possible, not matter how much wax or sealant is applied, especially when the car is on the expressway often as it is in my case. But, I had, even before buying the car (but after seeing it), thought about getting certain parts of the car repainted so I had ordered several pieces of 3M clear protection film pre-cut for the ISF, from the US.

Here are the film cutouts for the bumper and mirrors.
On my GT-R, I had successfully cut my own templates, from which I cut headlight protection thickness 3M clear film, and then applied to the headlights. So, I figured that with lots of time and patience, application of the bumper piece on the ISF would be the same, especially because it was already pre-cut.

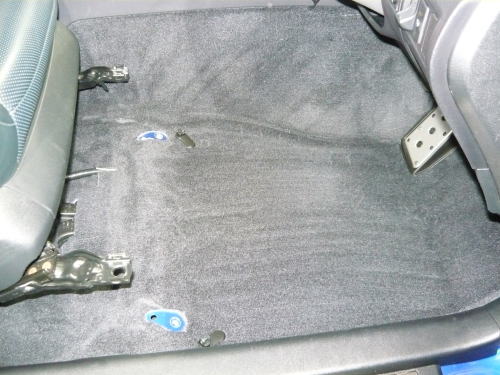
So, I took off the (required in Japan) license plate and its holder:
This must be the cheapest piece on the car. Will have to upgrade soon.

Those are some LARGE holes...
And then I washed the bumper and used a Zaino claybar to remove any dust, just in case:


After it was all clean, I sprayed the front bumper with the distilled water and baby shampoo mix:
The bumper film has yet to be peeled away and is sitting upside down on the hood

And then, as deftly as possible I removed the 3M film from its backing and tried to apply it to the bumper:
Was ok so far...
Finally got it on, somehow....
And then came the process of using the supplied squeegees to remove the activator fluid of distilled water and alcohol.

When I finished, however, I learned that 1) in getting the film to fit in some areas, I had overstretched the material so it would not fit in others, 2) despite my washing down the garage some dust had gotten trapped and caused some rough spots (redoing the application in places to remove this dust was driving me insane) and 3) some fluid just could not be removed.

What it looked like when I gave up...
Finally, after spending the entire afternoon doing this, as it began to get dark I decided to give up. The photo above was taken right before I walked away disgusted with myself.

The problem remained, however, what to do - could this be salvaged (I guess I could drive it around looking horrible until it was fixed) or was there another solution?

For the GT-R, I had also wanted to install some paint protection - I had bought a can of the 3M Paint Defender as well as a container of the Road Warrior Plus because I was concerned that I would not have the talent to cut bulk sheets of the 3M film to fit the GT-R.  But of course, for some reason I searched my garage and could find neither of these.

Finally I gave up, made some calls, and then found myself on Wednesday morning at a famous Porsche tuner in Yokohama, just 10 minutes away from where I live.


Stay tuned in Part 2 to see what I had done...

Tuesday, January 19, 2016

Some New Year Cleaning... Part 3

After the New Year celebrations I found myself on the holiday, Monday January 4th without anything to do.  The weather was nice, and even though I was relatively satisfied with how clean I had gotten the car, I decided to fool around a bit... famous last thoughts because I ended up working on the car until it got dark!

Anyway, first order of business was, I was wondering about what lay under all that plastic under the hood.  Turns out Lexus uses some very clever plastic clips which, if pushed down past the initial indent, allow for easy removal.  Once I began taking all the clips off, and began peeling off the plastic covers, I discovered this:
See all that dirt that had been trapped underneath the cover...
And you can see all that dust and dirt on the front strut area too! Amazing...
Dust and dirt on the plastic boxes and the front strut area on this side too
You can see the dirt on the bottom side of the cover as well
So of course, these pieces had to be washed with some Simple Green and cleaned up
You can see all the visible dirt all over... what to do?
Liberal application of Simple Green, being careful not to spray into what appear to be electrical items, and using a soft brush to make sure that all surfaces are cleaned. 
We ended up with all the rubber and plastic items cleaned up:
(Most) Everything is clean. 
Tower bar area...nice and clean (and yes, I applied Zaino AIO there too)
It goes without saying that I applied Zaino AIO to all painted surfaces under the hood. Then, it was just a matter of applying some engine protectant/detailer.

This stuff is good, but must be applied sparingly...
With the center cover back on... I actually like the way this looks, except for the half painted front frame.
Would look so good if it was all steel under the hood was painted to the same level as the rest of the body.
Yellow arrows point to the painted areas that got cleaned up and to which I applied ZAINO.
Meanwhile, while I was waiting for the plastic cover pieces, as well as the detailing spray to dry, I realized one minor detail I had yet to tackle:

Those exhaust outlets need some TLC!
So simply washing the car didn't remove this burnt on stuff...
The chrome polish easily took the crud off the top one...
So while the chrome polish made short work of the top exhaust outlet, the crud on the bottom one did not come off no matter how much I tried. So...

Time to use some mechanical help...
Now nice and shiny!!
I repeated on the other side, and then used some Black on Black spray instant black spray to bring the black back to the inside of the exhaust tips (after cleaning them out of course)

Look like real exhaust pipes? LOL. Who knows how long they will stay that way...
Put everything back together, and applied some more Aerospace Protectant
Done! Clean enough to eat off of!
Truth be told, there was one additional NON-cleaning item I took care of that day, which I will cover in my next post. Stay tuned!